Here it is, the long awaited Bubble Light rebuilding
procedure!
First, there is an easy way and a hard way to rebuild a Bubble
Light. The easy way is to buy new plastic housings to replace the old ones. The
hard way is to re use the old housing. The bubble tube does not wear out and can
be reused indefinitely. In fact, the only part that needs to be replaced is the
light bulb. (Updated) Replacement bulbs, housings, and bubble tubes were once
available from an online store, but are now hard to find. Most people use a 6S6
indicator bulb as a replacement, which can still be found at online stores.
|
|
|
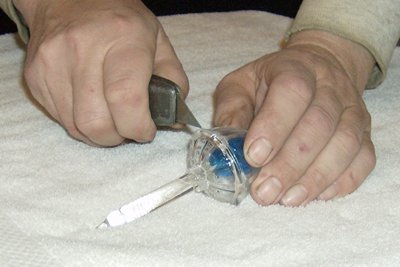
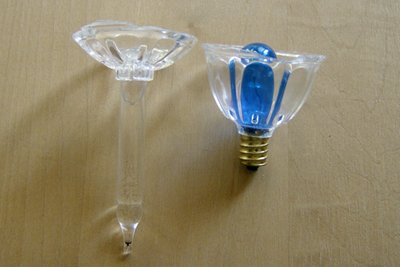
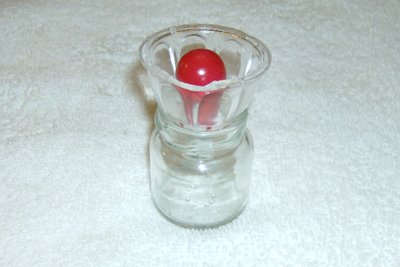
| 1- Cut the bubble light housing open. First, freeze the Bubble Light. This turns the glue seam brittle so it can be split with a utility knife. Work the blade into the seam and it should split open. | 2- The bubble light housing is split open. Notice the plastic did not split evenly, but that's all right as long as the seam is aligned when cemented back together. |
|
|
|
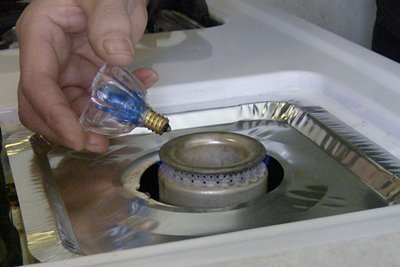
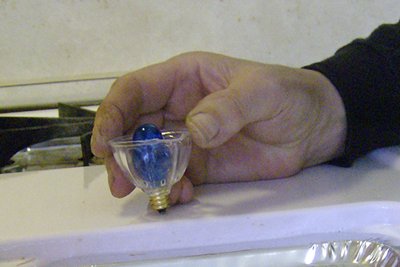
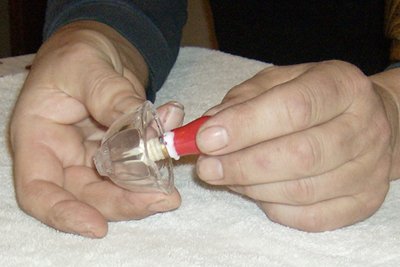
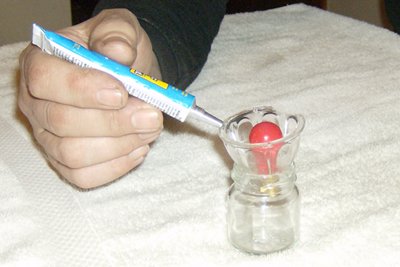
| 3- Heat the bulb base. To remove the bulb from the base first try soaking in the base boiling hot water. If that doesn't loosen the bulb then turn up the heat. Heat the bulb base only by applying direct flame from gas range (pictured), propane torch, or lighter. Be careful, heat for about 3 seconds just to soften the plastic. | 4- Press the bulb out of the base. The base should still be in good condition as long as you do not overheat the plastic. |
|
|
|
| 5- Insert the new bulb. Wrap the base in masking tape and use white glue to cement the bulb in place. At this point I recommend testing the new bulb before installing it! Let it light up for at least 12 hours to insure the bulb is good. With the imported stuff sold today, the quality just isn't there anymore. | 6- Let the glue dry. Set the base aside to dry for at least 24 hours. Remember, test the bulb before you install it! There is nothing more frustrating than finding out you rebuilt a Bubble Light with a bad bulb. |
|
|
|
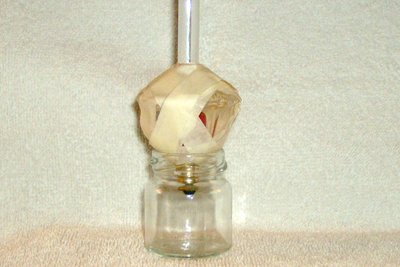
| 7- Apply solvent cement, the same type used to assemble plastic models, to the Bubble Light halves. Cement the bubble tube in place with white glue, if necessary. | 8- Let the glue dry. Wrap the Bubble Light in masking tape to hold it together and place it in a suitable stand to dry. |
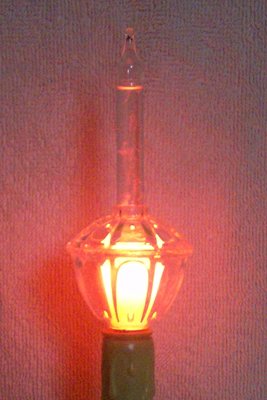
The final result. A Bubble Light that glows once again.